Last updated November 17, 2026



Free written scope consultation - allowances, timeline, and change-order rules on paper before a single trade is scheduled
Driveway & Pavers Troubleshooting: Common Problems and How to Fix Them
If you’ve re-sanded the same sunken pavers twice, you didn’t fix the problem – you just refilled the evidence of it. Here’s the thing most homeowners miss: the spot that looks broken is rarely the spot that failed. A dip at the edge of your driveway might be a drainage problem three feet away, or a tree root shouldering up from below, or a base that was never compacted right. Patch the visible symptom and you’ll be back out there after the next hard rain. This guide is about finding the actual failure point first, so a repair in Homestead or anywhere else in South Florida holds through more than one wet season.
Quick Answer
Most driveway paver problems come down to four root causes: a failed base, a drainage failure, tree-root intrusion, or a broken edge restraint. The surface symptom tells you which one you’re dealing with – edge pavers that separate first point to restraint, a whole area that dips evenly points to base, sand washing out in one direction points to drainage, and a localized hump or crack in a line near a tree points to roots. Diagnose the cause before you re-sand, or the repair won’t last a year.
Styles & brands we work with
- Kitchen remodeling
- Bathroom remodeling
- Home additions & ADU
- Roofing
- Windows & doors
- Driveway & pavers
- Fence
Table of Contents
- Why Pavers Sink and Shift: Base Failure vs. Drainage vs. Roots
- What White Haze (Efflorescence) Tells You About Moisture
- Why Edge Pavers Fail First: Inspecting Your Restraint
- Joint Sand Loss: Normal Erosion vs. Failed Bedding
- Which Paver Problems You Can Patch Yourself
- The Real Reason Pavers Move on the South Florida Coast
- When a Repair Becomes a Reinstall
- Common Mistakes to Avoid
Why Pavers Sink and Shift: Base Failure vs. Drainage vs. Roots
A sunken section looks the same no matter what caused it, which is exactly why it keeps getting re-sanded and keeps coming back. The fix for three different failures looks nothing alike. Here’s how we tell them apart in the field, and how you can at the edge of your own driveway.
Base failure shows up as a broad, even dip – often a bowl shape covering ten to thirty square feet. The pavers themselves stay tight to each other. Press on them and they rock slightly but stay flat to the surrounding surface. This is almost always a compaction problem: the sub-base was laid too thin, or the soil underneath was soft when it was built, or it settled after years of use. The fix means pulling pavers, re-compacting or replacing base material, and re-bedding.
Drainage failure is directional. Sand washes toward the street or toward the yard in a clear pattern, and pavers tilt the same way. Water is running under the pavement instead of over it. Look for a low spot that pools after rain, a downspout dumping onto the driveway, or a slope that was built too flat. The pavers aren’t the problem – the pitch is.
Tree-root intrusion is localized and uneven. One or two pavers heave up or crack in a line, and there’s a mature tree nearby. Roots lift pavers as they grow; you’ll see a ridgeline rather than a dip. Sometimes the fix is root pruning by an arborist plus re-leveling, sometimes it means rerouting the driveway edge.
How to diagnose which one you have
- Hose the area for two minutes and watch where the water runs. If it pools or runs toward the house, it’s drainage.
- Press a four-foot level across the dip. A uniform dip means base; a hump means roots.
- Walk the perimeter. Loose end pavers that lift easily point to restraint failure before any base work.
- Look up. A tree within twenty feet on the high side is a root suspect.
- Check the age. Unless a base was under-compacted, most base failures show within the first five years. Older dips are usually drainage or roots.
For a full walkthrough of how we build paver driveways so these failures don’t happen in the first place, see our service page on Driveway & Pavers in Homestead.
What White Haze (Efflorescence) Tells You About Moisture
That cloudy white powder on your pavers isn’t dirt and it isn’t a stain – it’s salt. Efflorescence shows up when water moves through the concrete below your pavers and carries dissolved minerals up to the surface, where they dry and leave a chalky film. In Homestead’s humid air and heavy summer rain, seeing some efflorescence on a new paver installation is normal for the first six months. Seeing it reappear year after year on an older driveway is a signal about moisture.
Here’s what to watch for:
- Even haze on a new driveway. Usually harmless. It fades with weathering and a proper paver cleaner after the first year.
- Efflorescence concentrated in one area. Moisture is coming up from one spot – a low base, a failed joint, or a slab beneath that’s holding water.
- Lingering haze along the bottom of a wall or patio edge. Water is wicking up through a control joint or a slab, not evaporating off the surface.
- White streaks that appear after every rain then fade. Water is tracking through a joint, not draining under the edge.
We’ve seen more efflorescence calls in Homestead after a wet spring than at any other time, especially in neighborhoods where a paver drive was built tight against a young Ficus or Live Oak whose shade keeps the surface damp into midday. If the haze keeps coming back in the same spot after cleaning, don’t reach for another bag of cleaner – get someone out to find where the water is coming from. A paver that’s properly bedded and pitched sheds water so it doesn’t linger long enough to pull minerals up.
Why Edge Pavers Fail First: Inspecting Your Restraint
Look at your driveway edge along the grass or the street. That row of pavers is the first to go – and it’s not the pavers’ fault. It’s the restraint. Every paver driveway needs a physical edge restraint, either a plastic L-channel spiked into the base or a poured concrete curb, to hold the field pavers from spreading. When that restraint breaks, loosens, or was never installed deep enough, the outside row starts to walk. Once the outside row moves, the pavers next to it unload, then the next. In two or three seasons you’ve got a chain-reaction shift that reads like base failure but started at the edge.
How to inspect your restraint in five minutes
- Stand at one end of the driveway and sight down the edge line. Any waviness in the outer row is a warning sign.
- Kneel down and push the edge pavers with your palm. If any lift or slide, the restraint is loose.
- Probe near the edge with a shovel. The base under the outer row should feel hard and compactable. Soft soil under the edge means the restraint spikes have lost their bite.
- Look for gaps between the pavers and the adjacent turf or curb. A gap wider than a quarter-inch at the joint is spreading.
- Check for roots, mulch buildup, or grass encroaching over the edge. Neither one breaks a restraint on its own, but both accelerate the decay of plastic L-channel restraint over the years.
Restraint failure is worth catching early. It’s one of the genuinely fixable repair calls – resetting a short run of edge pavers and re-spiking the restraint is far less disruptive than a full field repair, and far easier on the wallet. A properly installed edge should hold for the life of the driveway, which is why we don’t shortcut the edge on new installs and don’t patch over a failing one on repair calls.
Joint Sand Loss: Normal Erosion vs. Failed Bedding
Every paver driveway loses sand from the joints over time. Rain, wind, and the tires rolling over the surface push polymeric sand out of the grooves, usually a sixteenth to an eighth of an inch per year on a well-built drive. Refilling those joints once every other year under heavy use is normal maintenance. What isn’t normal is losing two inches of sand from one area in a single rainy season, or finding sand pooled in the low spots of the driveway in the morning after rain.
Here’s how we draw the line:
- Normal erosion. The joint settles evenly across the field. The pavers still feel locked when you walk them. Sand loss is slow and consistent year to year.
- Failed bedding. Sand washes out of a concentrated area and the pavers next to it start to rock. Where the sand goes, the pavers go. Once the bedding (the layer of sand under the pavers) is gone, the paver has nothing to sit on, and it will move.
- Failed joint stabilization. New polymeric sand that cures wrong – too soon, or in too much moisture – will crack and release in sheets rather than losing gradually. You’ll see chunks rather than grains.
- Underlying water. Joint sand that turns to mud in one area but not another points to water passing through the base under that area only.
The correct maintenance move is a proper polymeric sand refill after a dry spell, packed to the correct depth. Filling over a section where the bedding is already gone will just create a bridge the pavers will fall through again the first time it rains. If you can’t tell which one you’ve got, this is one to have diagnosed – the wrong treatment here turns a small repair into a re-bed.
Which Paver Problems You Can Patch Yourself
Pavers are one of the more DIY-friendly surfaces on a home, and a homeowner with a pry bar and a bag of polymeric sand can handle a surprising amount. But there are real boundaries, and crossing them can take a fair repair call into a reinstall. Here’s the honest split.
Genuinely DIY-friendly
- Replacing a single cracked paver. Lift it with two pry bars, keep the bedding intact, swap in a replacement, re-sand and tamp the joint.
- Refilling joint sand, as long as the base is solid and the loss is uniform across the field.
- Spot crack-filling in a concrete border or curb with proper concrete patch material – cosmetic only.
- Efflorescence cleaning with a homeowner paver cleaner once, to see whether it comes back. If it returns in the same spot, stop cleaning and call somebody.
- Removing weeds from joints by hand – never pressure-wash the sand out of the joints to get at the weeds.
Leave it to a professional
- Base failures, even small ones. The only real fix is re-compacting or replacing base material under that section, and it needs a plate compactor and correct depth to hold.
- Restraint resets on a run longer than a single paver.
- Drainage modifications of any kind – re-pitching pavers, adding a channel drain, re-routing downspouts to stop dumping onto a driveway.
- Tree root intrusion that involves the tree. Root work should be routed through an arborist to avoid killing a mature shade tree.
- Any paver area with a drainage failure underneath, because a surface patch will not fix the water.
We mention that line carefully because homeowners have a real stake in it. A repair that a licensed contractor makes carries a workmanship warranty. A patch made by a homeowner on a proper repair call can void that warranty if the second repair fails because the first patch caused it. If you’re in the middle of a Home Addition and ADU project and pavers are moving, call your contractor before you touch the pavers – see Home Additions & ADU in Homestead for context on how the driveway ties into site work on larger builds.
The Real Reason Pavers Move on the South Florida Coast
Homestead sits on a very specific geology: shallow limestone under a thin layer of sandy soil, some of the highest summer water tables in the state, and a wet season that dumps a month’s worth of rain in a single afternoon. That combination changes the paver failure pattern compared to the rest of the country. Water doesn’t just fall on the driveway. In a hard storm, groundwater rises close to the surface, and it pushes up through a base that wasn’t built for that hydrostatic pressure. We’ve seen pavers float a half-inch overnight after a heavy June system in neighborhoods on the western edge of town, where soil stays wetter into the dry season.
What this means for troubleshooting in Homestead:
- Drainage-first goes double here. A driveway that drains fine for eight months of the year will show cracking and settling during the wet season. Don’t assume the paver is wrong; assume the water is.
- Base depth matters more than paver color or brand. Limestone base with proper compaction, installed thicker than upstate code minimums, is the single best defense against the seasonal cycle.
- Mulch against the paver edge is a moisture trap. We see this on driveways abutting landscaping beds. Mulch keeps the edge wet, the edge restraint decays, and the outer row walks. Keep a clean gap and use a proper edge material.
- Salt air ages plastic restraint. Restraint systems on driveways within the coastal zone age faster than inland installs, and inspection matters more often.
If you’re near the coast and other trades are involved, our Fence Installation in Homestead page gets into similar ground-moisture issues with post embedment. It’s the same underlying geology, just a different install.
When a Repair Becomes a Reinstall
Some paver drives are repairable and some are a reinstall wearing a repair costume. The honest question is whether the repair will hold. Here’s what tips the balance toward reinstall:
- More than a third of the field is moving. If the base under the majority of the driveway is the source of the failure, patch-in can’t fix what’s around it.
- Two failed repairs in the same area within three years. Same dip twice means the underlying cause wasn’t addressed either time.
- Failed bedding across the driveway, not just at joints. If pavers everywhere rock underfoot, it’s a field problem.
- No edge restraint installed, or installed on soil rather than base. Retrofitting a proper restraint is a full-perimeter reinstall.
- Original base under four inches of compacted limestone, which is a common shortcut in older driveways that fails on South Florida soils long-term.
- Water management impossible on the current layout. If the drainage can’t be corrected without re-pitching the field, it’s not really a repair.
When a reinstall is on the table, it’s worth doing once and doing right – proper limestone base, a real edge restraint, matching premium pavers, and drainage planned around the site. That’s the kind of job permits and inspection sign-off actually matter on, and it’s the kind that outlasts the origination of the problem. If you want the full picture of what a proper install looks like from our end, see Barrett & Sons Construction Homestead home.
Common Mistakes to Avoid
- Re-sanding a sunken section without diagnosing it first. If the cause is a base failure or a drainage failure, the sand will be gone again after the next rainy season, and you’ll be back out with a broom.
- Pressure-washing joints to remove weeds. It strips the polymeric sand out of the joints, removes the paver lock, and accelerates the base failure you were trying to prevent.
- Adding sand to a joint that’s already lost bedding underneath. The new sand bridge collapses the first hard rain and takes the surrounding pavers with it.
- Patching edge pavers and ignoring the restraint. The pavers move again in weeks because the cause was never the paver, it was the missing or broken edge.
- Sealing a paver drive to “fix” efflorescence. Sealing a surface that’s still passing moisture will lock water inside, and the haze and the movement both get worse.
- Running automatic irrigation against the paver edge. It’s the most common cause of edge erosion we see in newer Homestead subdivisions, and it’s completely avoidable with a fixed head away from the driveway.
- Cutting roots on a mature tree without an arborist. It’s a shortcut that kills the tree and, more often than not, the driveway never actually stabilized.
See the difference
 Before
 After
 Before
 After
 Before
 After
When to Call a Professional
Call somebody when the answer to “will this hold through a wet season” is anything short of “yes.” That means base failures of any size, drainage problems, restraint resets on multiple pavers, root intrusion that involves the tree, and any repair where a previous homeowner patch has already failed once. This is also the point to stop treating pavers as isolated – a paver problem on a driveway that abuts a home addition or a fence line is often a site-wide water issue, not a paver issue. A proper diagnosis before the crew is on site saves the most money in the long run. Barrett & Sons Construction Homestead offers free estimates in Homestead – call (866) 344-6796 to schedule one and get a straight answer on whether it’s a repair or a reinstall.
Frequently Asked Questions
Because the base under that area is failing, not the pavers. If a paver section sinks twice, the cause is almost always under-compacted base material, soft soil, or water passing under that section that was never corrected. The only real fix is to pull the pavers, address the base or the water, and re-bed the section – re-sanding over it just resets the clock. Call (866) 344-6796 for a free estimate on a proper diagnosis.
Not usually, if the driveway is new. Efflorescence is a mineral haze that appears when water moves through the concrete below the pavers, and some is normal in the first six months. It’s worth investigating when it returns in the same spot year after year – that points to trapped moisture under the field, and the paver cleaner won’t fix a water problem. Call (866) 344-6796 if it keeps coming back.
Most single-area repairs run in the low hundreds to a low four-figure range depending on how much base rebuild is involved and whether the edge restraint needs replacing. A re-bed of a small section is on the low end; a repair that requires resetting a failed edge and rebuilding base across a third of the field moves toward the top. We quote every repair with a written scope and written change orders before any work starts. Call (866) 344-6796 for a free estimate on your driveway.
Yes, at low pressure and with the correct nozzle, and never aimed straight down into the joints. High pressure washes the polymeric sand out of the joints and, once the sand is out, the pavers start to walk under tire traffic and rainfall. If the surface has weeds in the joints, pulling them by hand or using a joint-approved herbicide is safer than pressure-washing them out. Call (866) 344-6796 for a free estimate on a proper joint sand refill before you clean.
Because the edge restraint – the plastic L-channel or concrete curb that locks the outer row – has failed or was never installed correctly. The outer pavers then spread under load, and the pavers next to them unload in turn, which reads like a field failure but started at the edge. A licensed contractor can usually reset the edge without touching the whole field.
Yes, on any job where the permit is required. On any eligible paver or hardscape project we pull the permit and get the inspection signed, and that inspection is there to protect you – the inspector works for you, not for us. It’s also a written item on every scope we hand out. Call (866) 344-6796 and we’ll walk you through what your specific property requires.
The Bottom Line
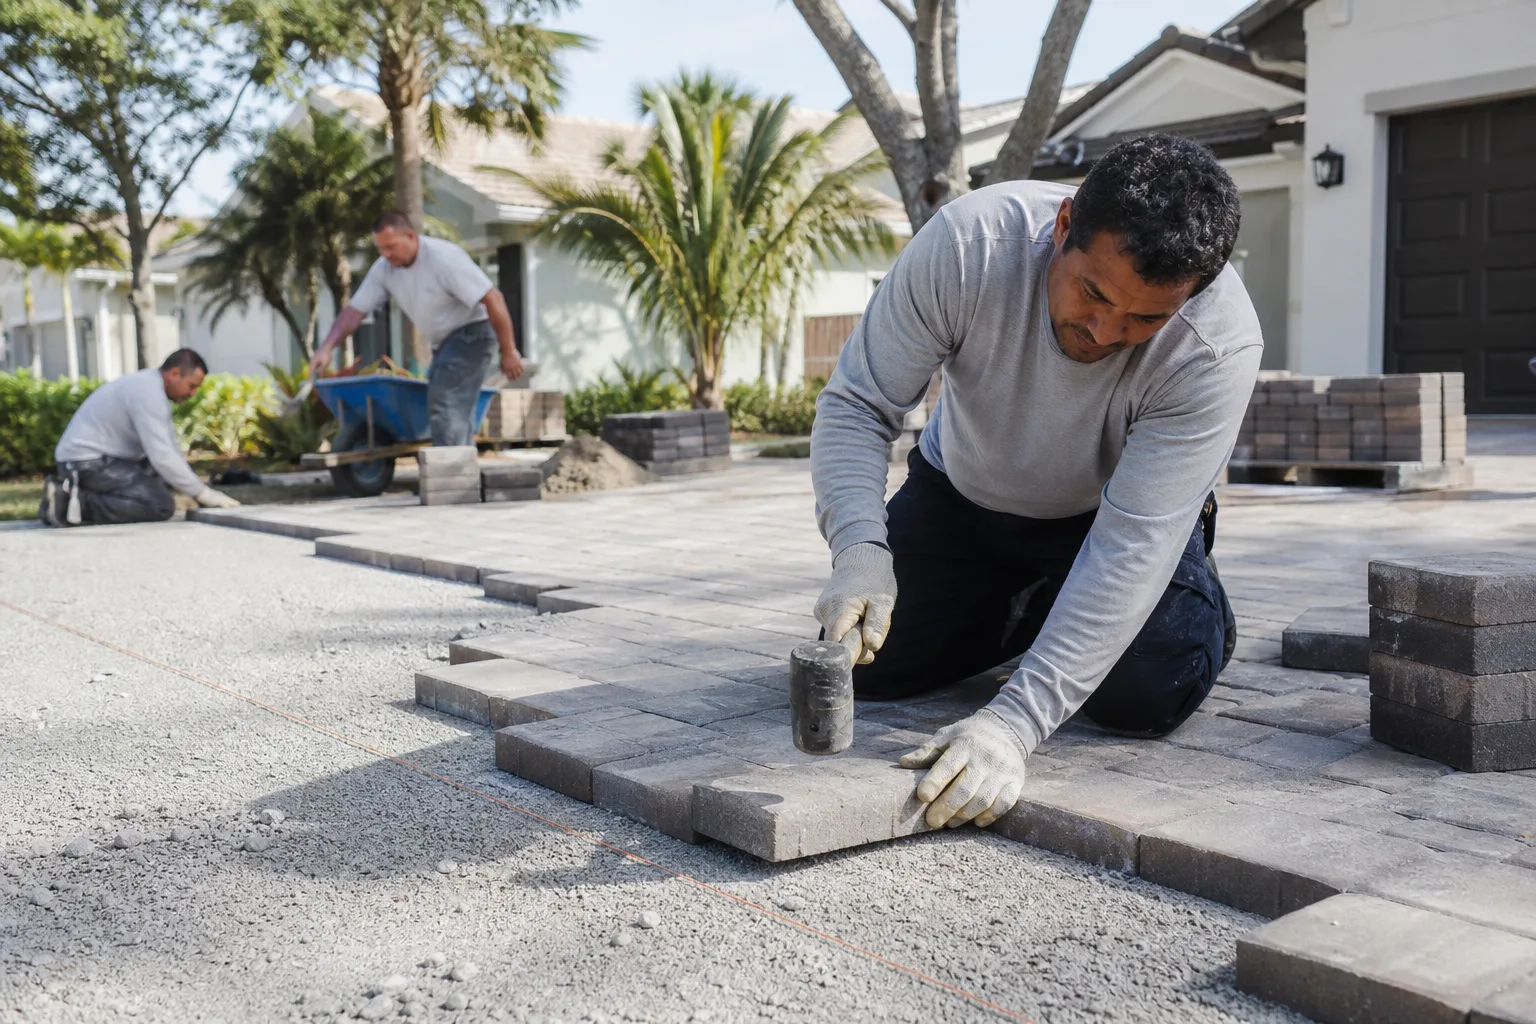
Paver problems are diagnosis problems first and repair problems second. The spot that looks broken is almost never the spot that failed – it’s a base that was never compacted right, water that’s running the wrong way, a tree root shouldering up from below, or an edge restraint that gave up two seasons ago. Find the cause, fix the cause, and the driveway stays level through the next wet season. Patch the symptom, and you’ll be sweeping sand off the driveway every spring. If you’re in Homestead and want to know whether you’re looking at a repair or a reinstall, call (866) 344-6796 for a free estimate.
Written by the team at Barrett & Sons Construction Homestead.